

Christmas window art is a fun project for a weekend at home or an afternoon with your friends. These seven white-marker ideas give you a starting point, plus a way to plan the drawing and check your supplies before anything goes on the glass.
I'd start with the little village or the bow with long ribbon tails. One gets you a whole row of tiny houses; the other lets a single drawing take over a pane. Both sound like a pretty good reason to put on your Christmas playlist.
Before you start your Christmas window art
Choose a removable window marker or liquid chalk marker whose label specifically allows use on your glass. A permanent paint marker is a different product, even when the pen looks similar. Crayola's window-decorating guidance identifies its washable Window Markers as a product made for this job.
Read your window manufacturer's care instructions, too. If the glass has a film, coating, texture, or treatment you cannot identify, check with the manufacturer before drawing. For a rented space or a shared window, get the owner's permission first. Keep the drawing on the permitted glass surface and off the frame, seals, and curtains.
Gather a white marker, a soft cloth, paper for your sketch, and something to protect the sill. Following the product directions, try a small mark in an unobtrusive spot. Let it dry and test the stated removal method before committing to the whole design. Clean and dry the glass using a method allowed by the window manufacturer.
I'd work on the inside of a window you can reach from the floor. Plan around the handles and the way the window opens. A drawing can fit into one pane; it does not need to stretch across the whole window. If you're adding words, decide which side should read correctly before sketching them. These ideas use shapes, so there's no backwards lettering to plan.
Before choosing a marker tip, look at the smallest detail in your sketch. Little house windows and leaf outlines need room between their lines. A fine tip gives you more space for those details; a broader tip suits a large bow or big star. If your marker makes a wider line than you expected, enlarge the drawing rather than crowding the strokes together. Test the line on the permitted patch of glass first. For a window divided into small panes, you might choose fewer, larger shapes so you can see the design from across the room.
1. Hanging stars at different heights
Draw three five-point star outlines and add a thin line above each one to look like a hanging string. Put one star lower than the others and vary their sizes. Leave a little space around each outline so the points are clear.
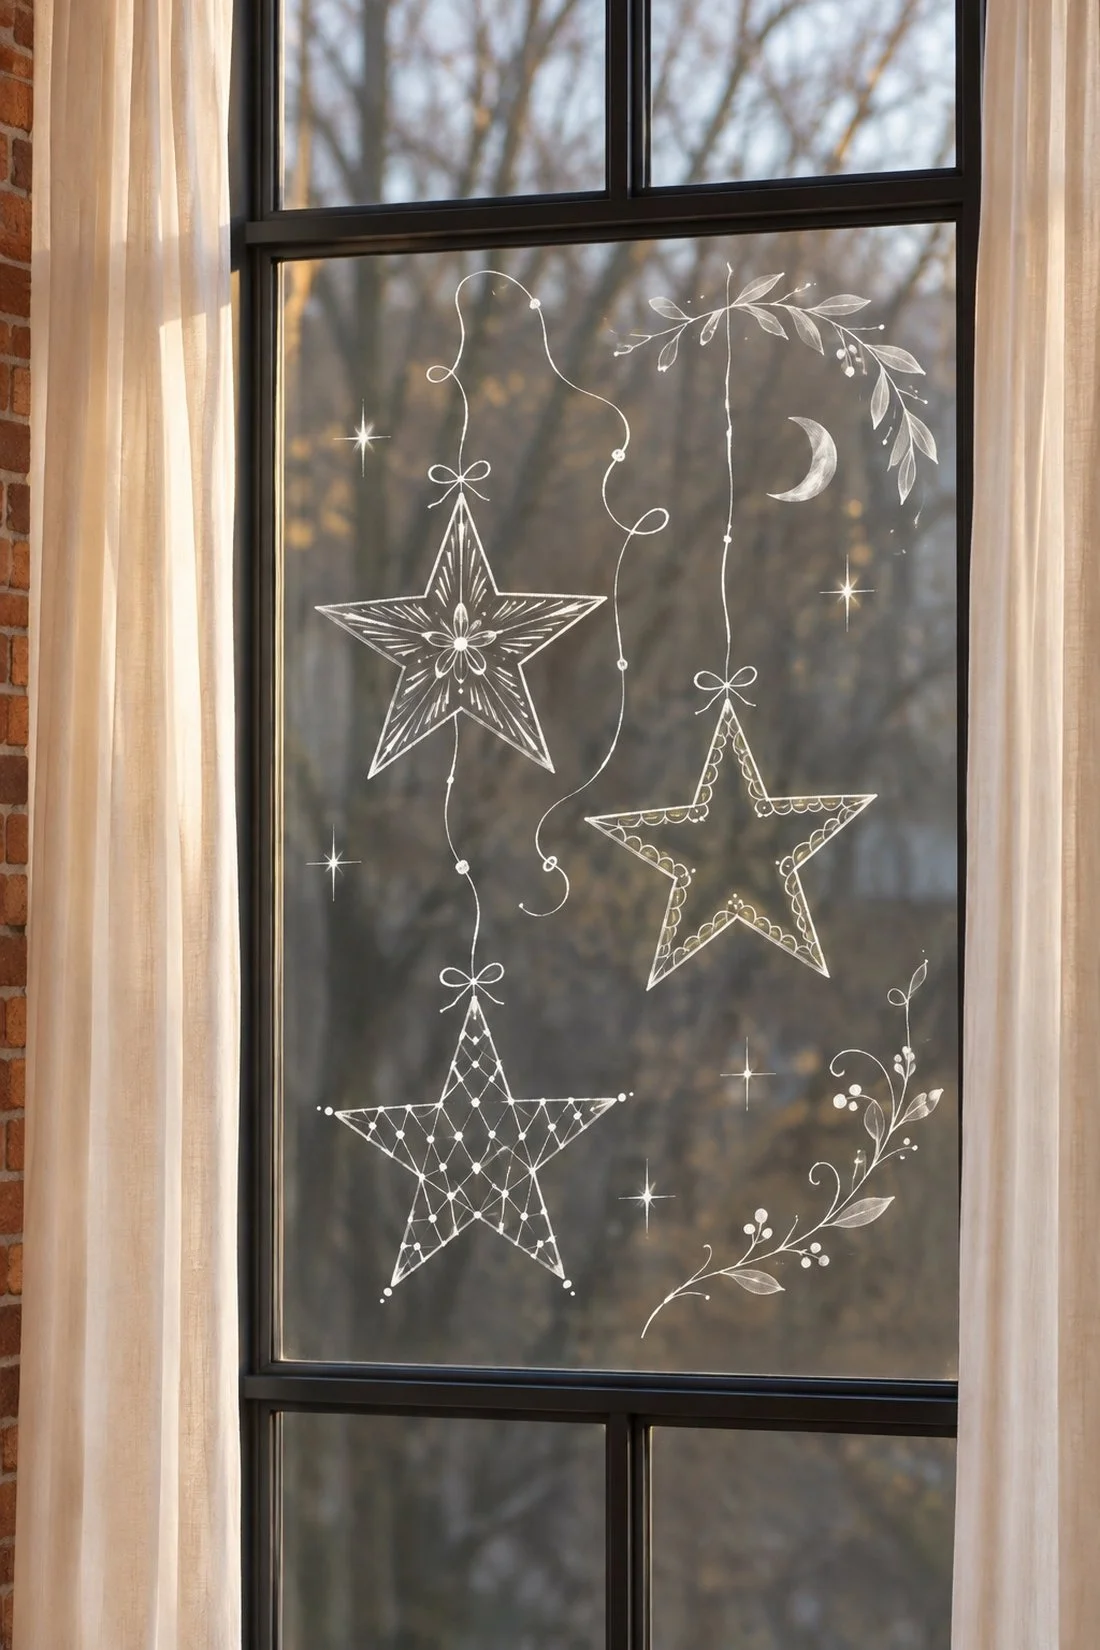
For a narrow pane, stack the stars loosely from top to bottom. For a wide pane, spread them across the upper half. A few tiny dots between them can be the snow. I'd stop and look from across the room before adding more; the clear glass is part of the design.
For a more detailed version, add a second border inside one star, little scallops inside another, or a flower at the centre. Curl the drawn hanging lines and add a fine leafy sprig near a corner. Sketch the main outlines on paper first. You can practice where the five points go before picking up the window marker. Keep your sketch nearby so you can check where each point belongs before drawing the next star. Leave the same amount of clear glass around each point so neighboring shapes have room. Slightly different stars are welcome here. They make it look like someone spent an afternoon drawing them, which is exactly the idea.
2. A bow with long ribbon tails
Start with a small knot shape, then draw loose loops on either side. Let the ribbon tails curve and twist instead of falling straight down. A few slender lines inside the loops can suggest folds, and little scallops along a tail add a lace-like edge.
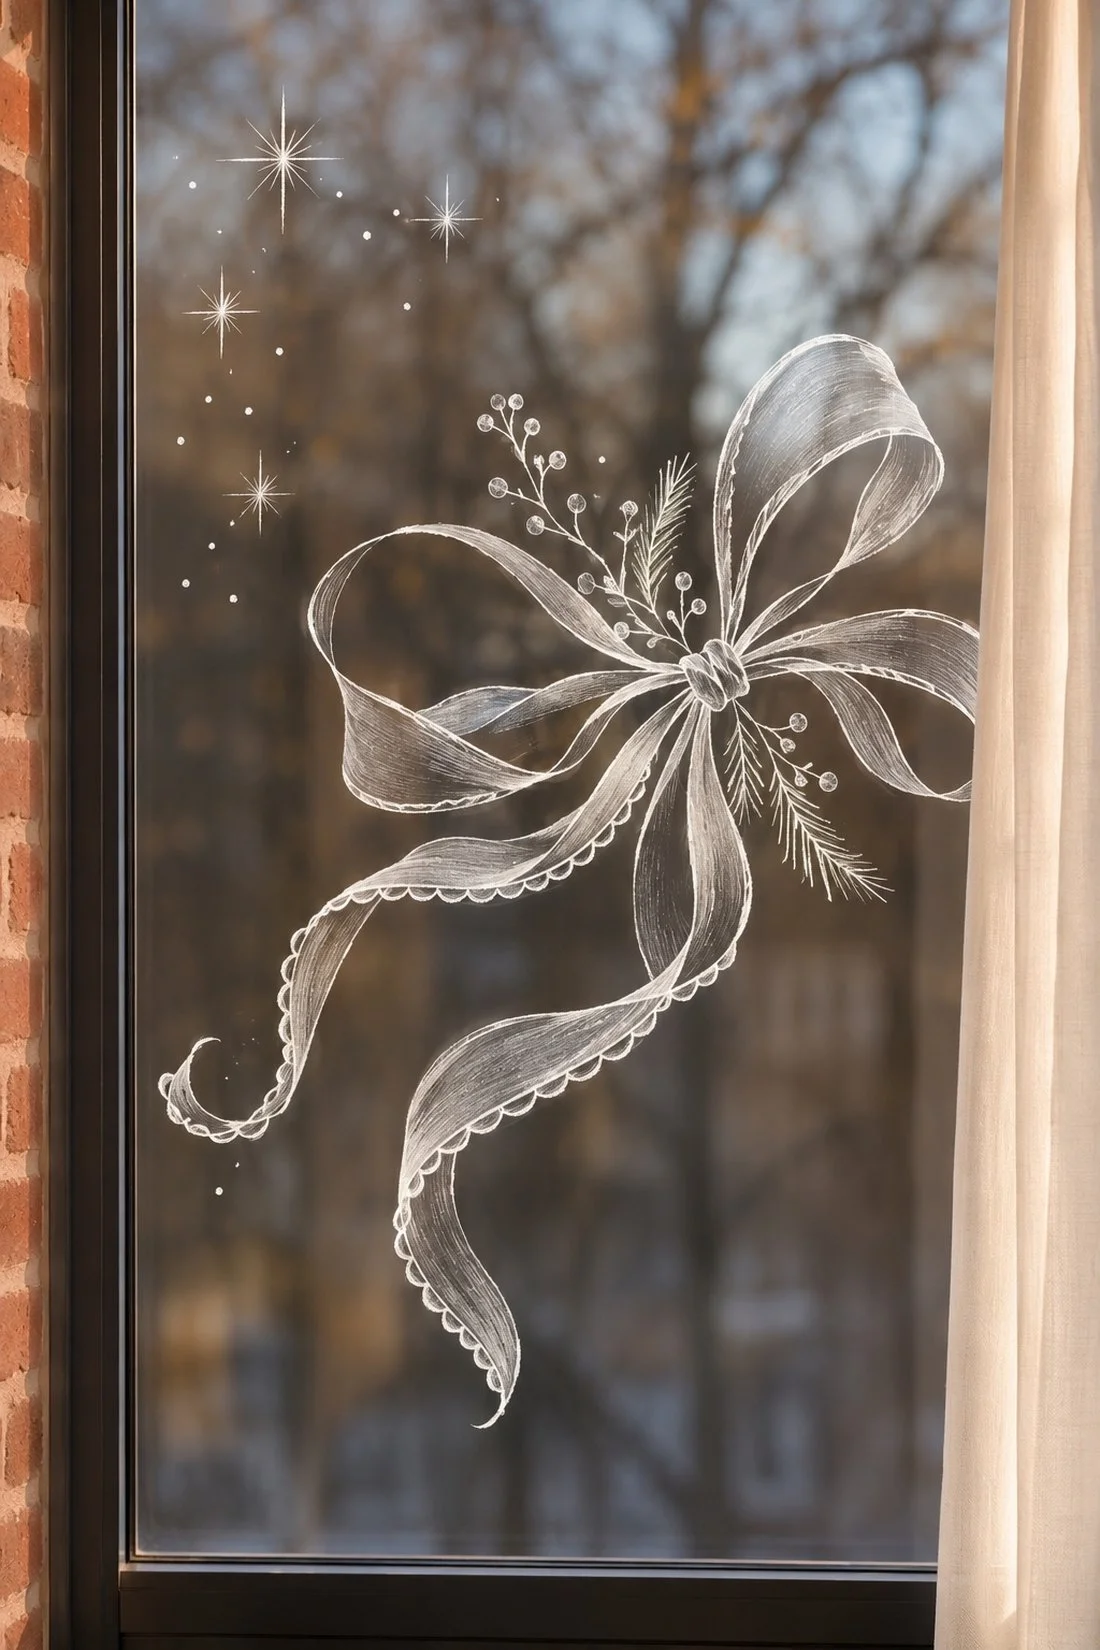
This is the design I'd give a whole pane of its own. The long tails do most of the decorating. A fine pine sprig and a few berry stems near the knot can make it feel like a little ribbon arrangement, all drawn in white. If you'd rather keep the drawing small, put a bow near one upper corner and let the rest of the glass stay clear.
To repeat bows across several panes, keep their overall size similar and let the loops vary a little. You could each draw one if friends are over. Nobody has to match somebody else's ribbon exactly.
3. A little winter village along the bottom
Draw a row of houses near the bottom of the glass. Begin with the rooflines, changing the height and shape of each one, then add walls, windows, and a door. A tall narrow house beside a short wide one gives the row some variety. You can tuck a slender tower between them, too.
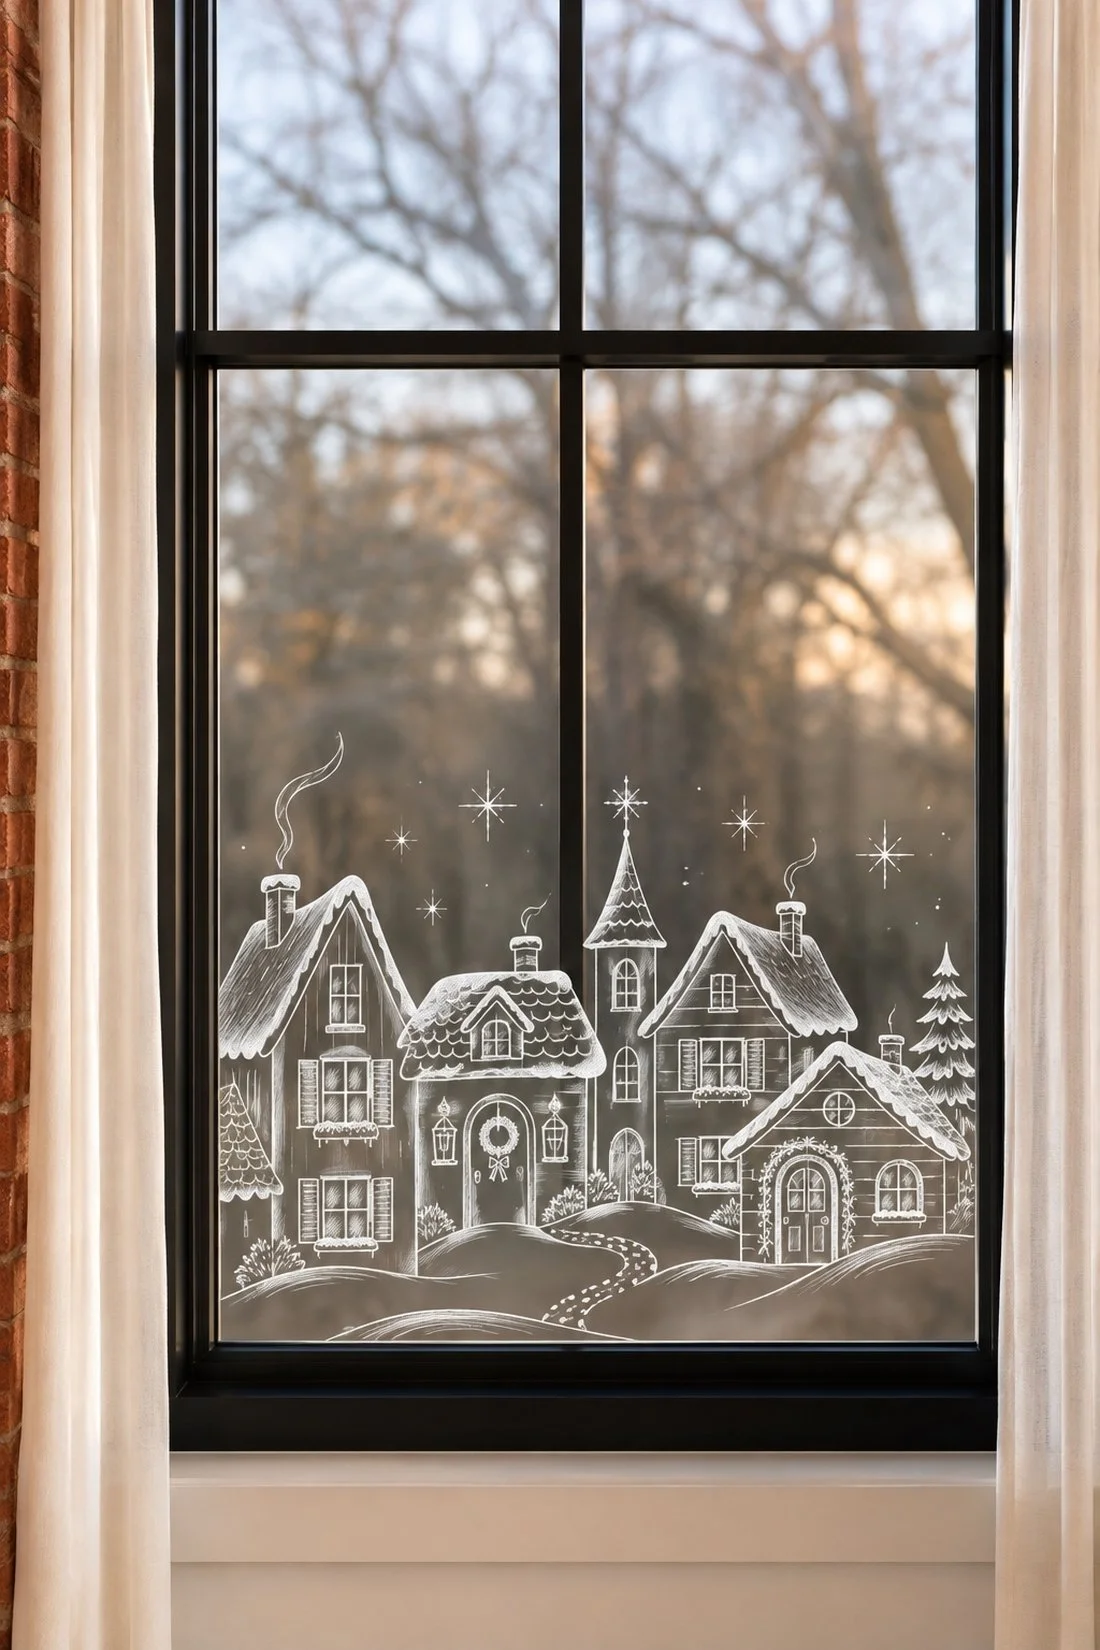
Keep the details large enough to see. One house might have four square windows, while the next gets an arched doorway. Add roof tiles, little shutters, a door wreath, or curling chimney smoke. A winding dotted path and a few curved snow mounds can join the buildings. There is plenty happening in the houses already, so the sky above can stay mostly open.
For a window with several panes, plan each house inside a pane or use the frame as a break between buildings. I'd sketch the whole row first so the last house doesn't have to squeeze into the corner. Tiny neighborhood planning. Very important business.
4. Three feathery Christmas trees
Draw one taller tree and two smaller ones, starting with a slender trunk for each. Work outward from the trunks with loose branches that angle down. Add shorter strokes along the branches for a feathery look, letting a few tips curve differently from their neighbours.
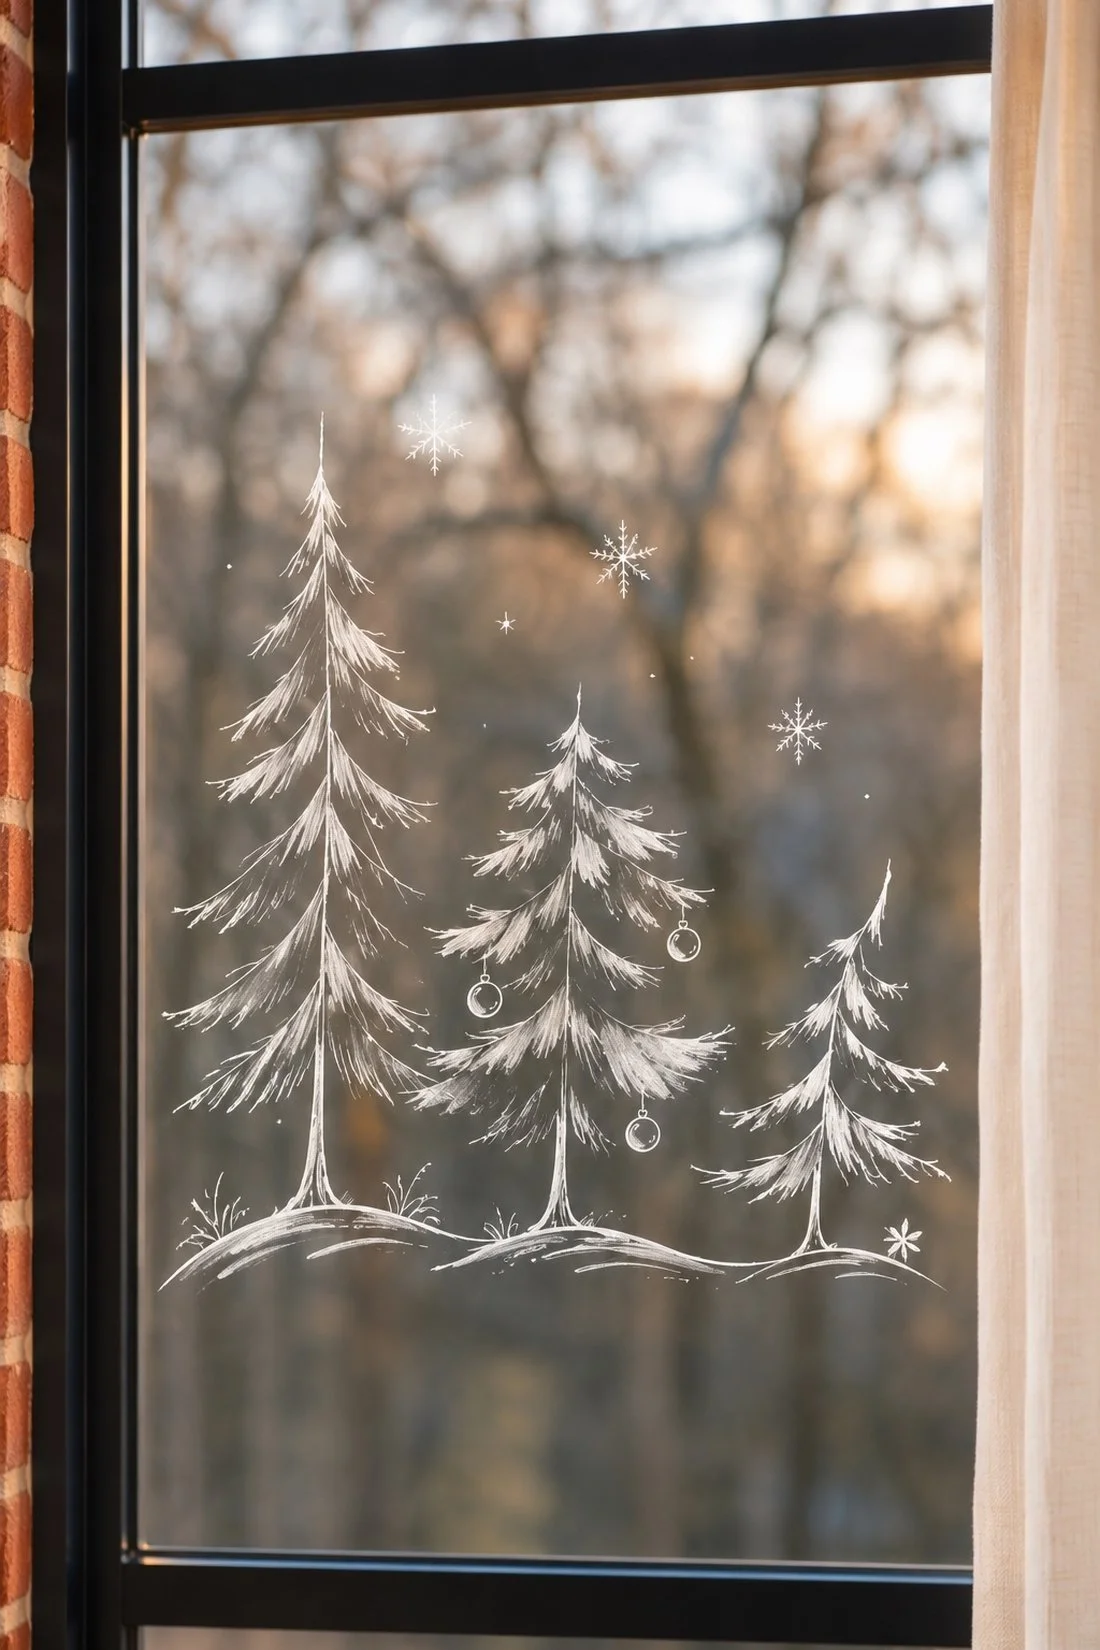
You can arrange the trees along a low curved snow mound. Vary their widths as well as their heights: a tall narrow fir beside a rounder one gives you more to play with. A few little outlined baubles on one tree can be the Christmas detail. I'd leave the other two with their branches showing.
For the fine needles, keep some gaps between your strokes so the glass still shows through. You can build the detail gradually, stepping back between layers. The trees can each have their own shape. The little leaning one gets to stay.
5. Ornaments with decorative patterns
Draw a round bauble, a smaller oval, and a long teardrop shape. Add a little cap and a hanging line above each one. A fine bow at the top of a line makes a cute finishing detail before you start on the patterns.
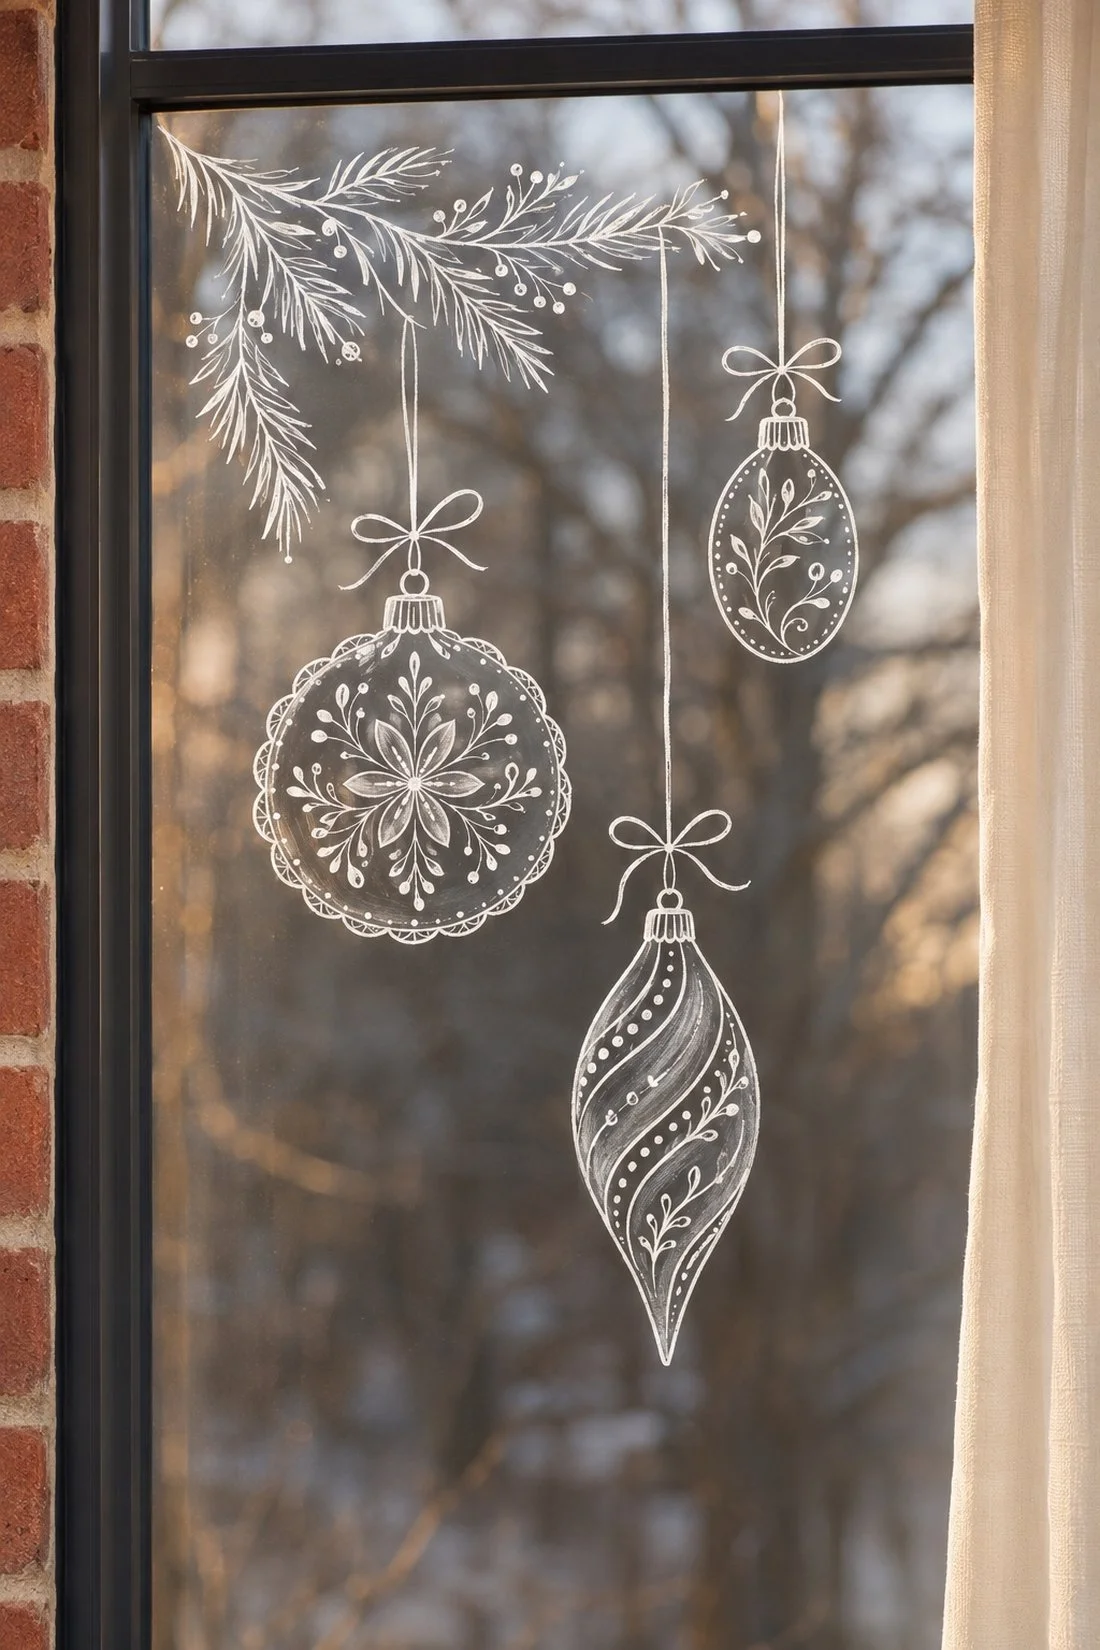
Give each ornament its own design. Try a flower with radiating petals inside the round one, a little leafy stem inside the oval, and curved stripes down the teardrop. Small dots or a scalloped border can fill out the edges. Sketch the largest shapes first so you have room for the smaller details.
Vary the lengths of the hanging lines, and let a drawn pine spray curve in from one upper corner. This would be lovely beside your Christmas tree, especially if you can borrow a pattern from an ornament you already have. The tiny painted flowers on an old bauble could be your starting point.
6. A leafy garland around one corner
Draw a curved stem along the upper edge and down one side of a pane. Add narrow leaf outlines in pairs, following the direction of the curve. Keep the leaves close to the edge so the centre stays open. Mix in fine pine needles, a few berry clusters, and a small pinecone. One or two curling ribbon tails can finish the corner.
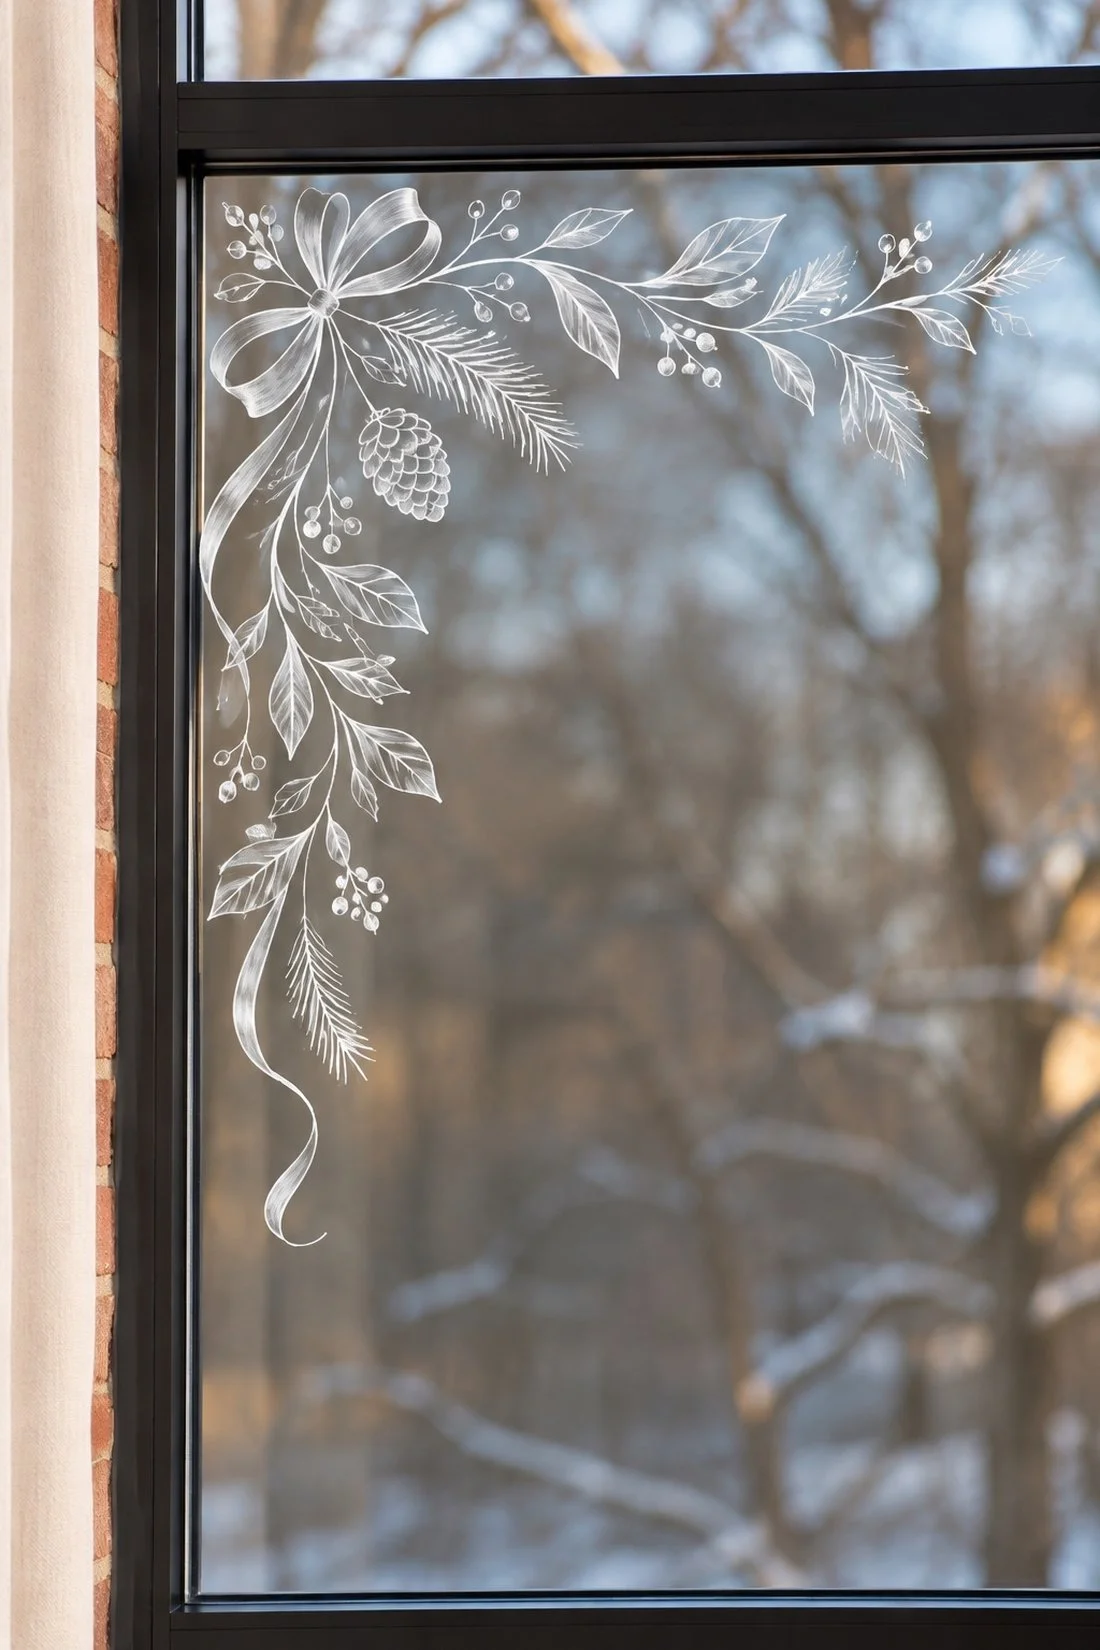
A single corner is enough for this one. You can choose the side that shows best when the curtains are open, then let the stem taper off before it reaches the bottom. I'd draw the curve first and add leaves a few at a time rather than outlining a whole border at once.
If you already have greenery nearby, the white drawing can repeat that shape without adding another physical garland. A handful of small dots near the leaves can tie it to stars or a village in the next pane.
7. Snowflakes and scattered snow dots
For a six-armed snowflake, draw three lines through one centre point. Add short branching strokes near the ends. For the larger flakes, try a little diamond at each tip, a nested hexagon in the middle, or feathery branches with tiny dots at their ends. Repeat with a few different sizes, giving each snowflake its own pattern.
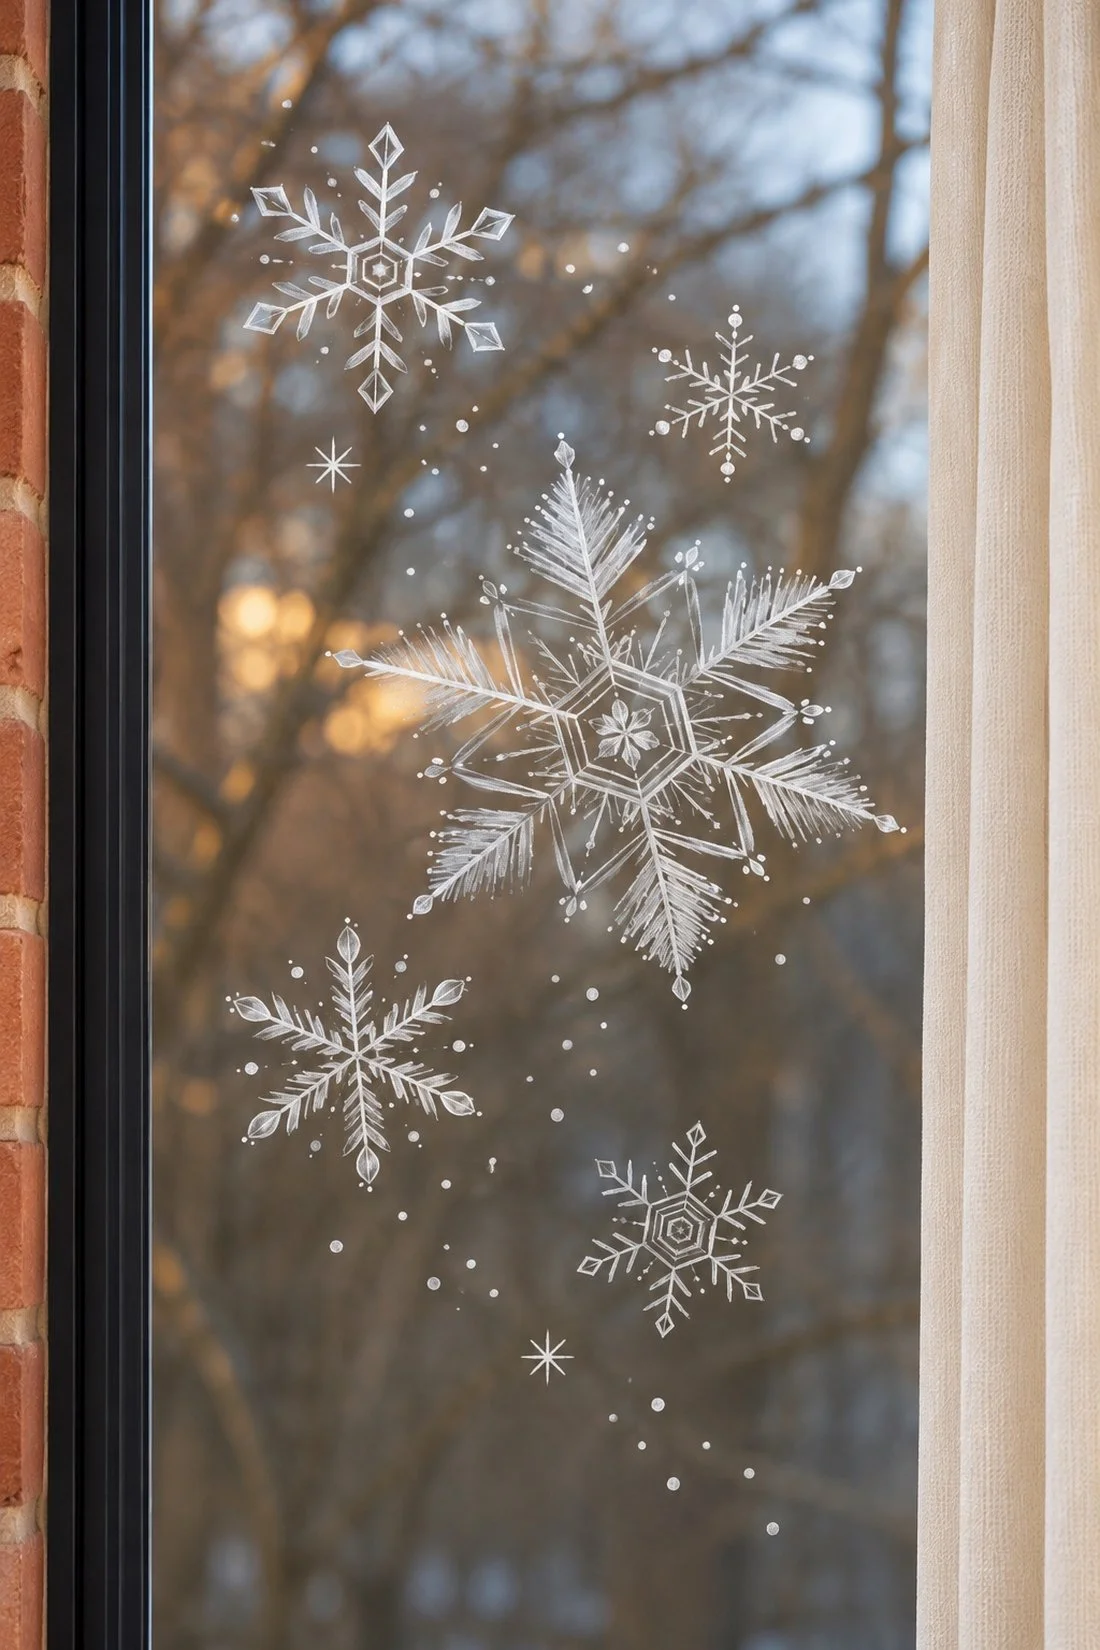
Scatter dots between the snowflakes, keeping some areas clear. I'd place the big flakes first, then fill a few of the gaps. That gives you a chance to step back before the whole window becomes a snowstorm.
This design can stay wintery after the Christmas decorations come down, if the marker and window care instructions allow it. To change the arrangement, remove a whole snowflake with the approved method and redraw it once the glass is ready. Working in separate little motifs makes those changes more manageable.
Make it an afternoon with your friends
Choose one shared design or give each person a pane. Before anyone starts, agree on the marker, the part of the window you're decorating, and who is handling cleanup. Keep the supplies on a protected surface away from the curtain fabric.
You could pair this with another of these hands-on hobbies to try during senior year, or save a few of the paper and craft ideas for an afternoon at home for the table. One window and a few white stars can be the whole plan, too. For a cold afternoon in Bolivar, I'd happily take the indoor option.
How to remove window-marker drawings
Follow the instructions for the exact marker and your window. For its 4090 chalk marker, edding describes removal from non-porous glass with a damp cloth. That guidance applies to the stated product and surface; it is not a promise for every paint pen, coating, or film.
Protect the sill while you wipe, and change to a clean part of the cloth as the drawing lifts. Keep the residue off nearby fabric. If a mark does not come away as expected, stop and check the product and window care advice before trying another cleaner or tool.
Before you erase the last little house, you might want a picture of the finished window. The crooked roof gets to be in it, too.
You might also like
Christmas photos to get you in the decorating mood
Photo ornaments to make and give this Christmas
